


Here’s a step-by-step guide to making your first loaf of sourdough bread! While you don’t need bread in your diet. But if you’re going to eat it, sourdough is worth learning and sooo delicious!
In recent years, the war on gluten has led a lot of people to cut out wheat entirely. We were one of them for a while! These days, the main gluten I eat is in sourdough or homemade tortillas, and when we do use wheat, we make sure it’s high quality, organic, and in a form that’s easiest for our bodies to digest.
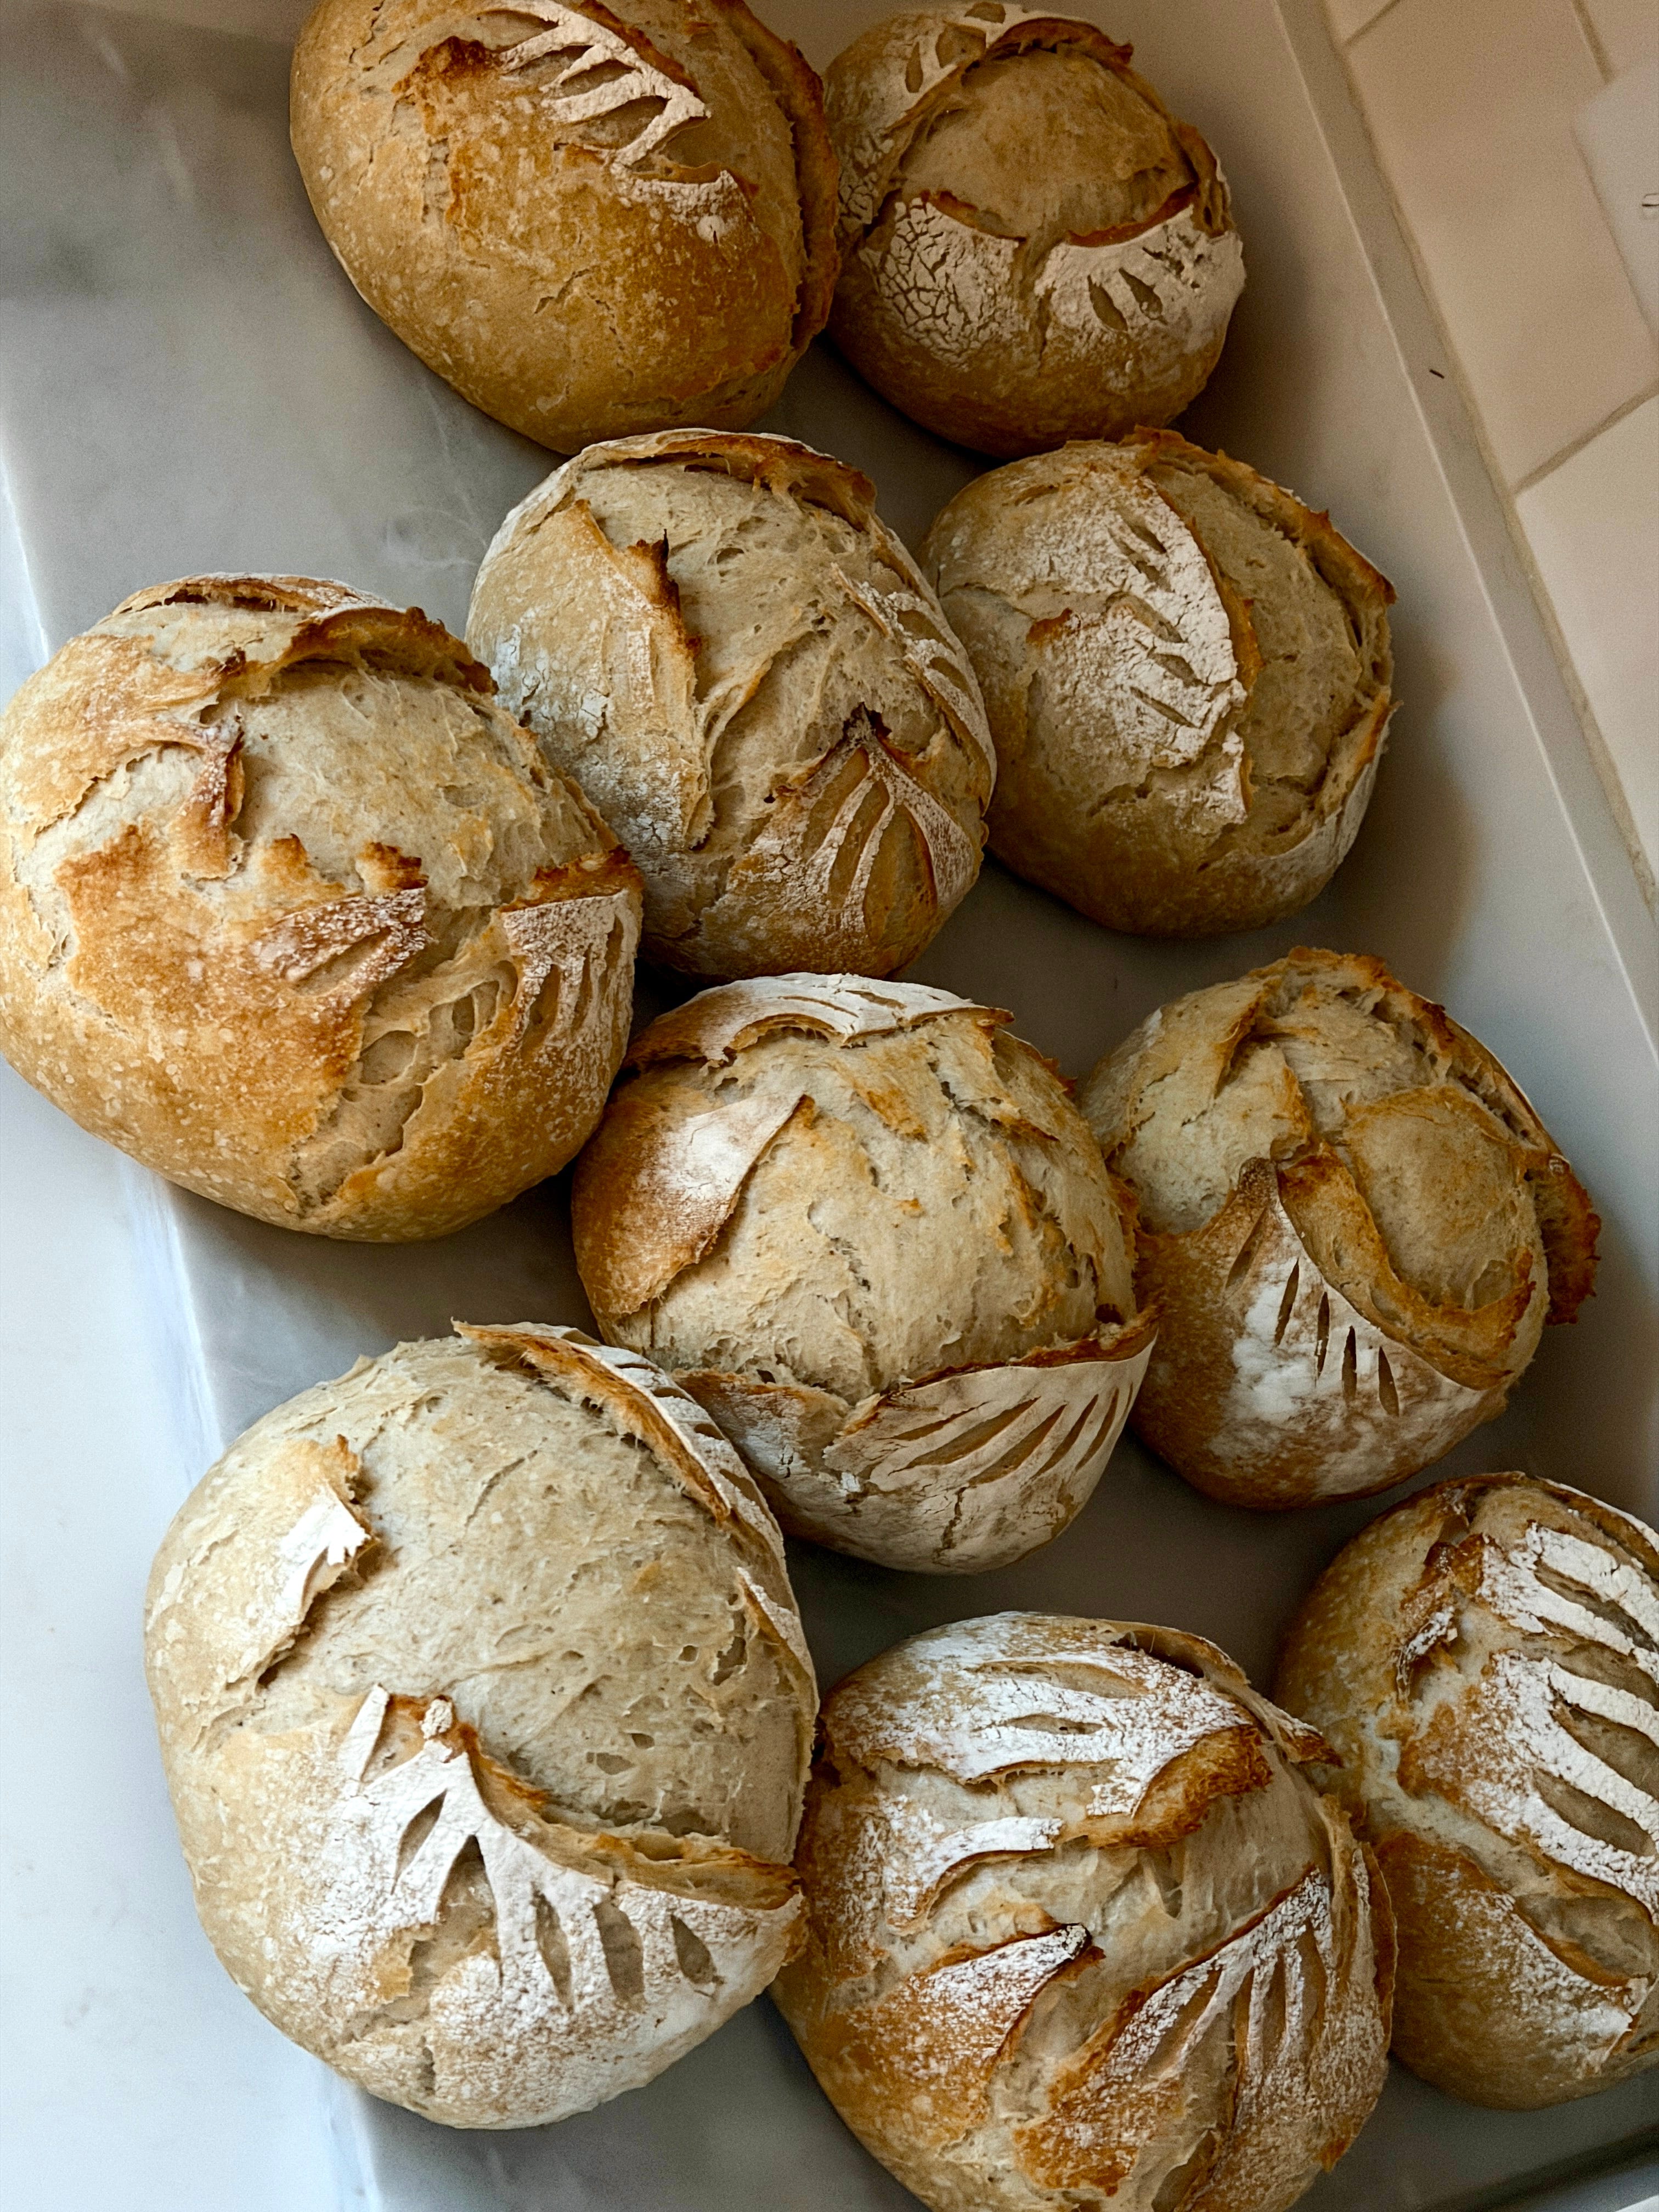
There’s a big difference between a loaf of sourdough and what you grab off a grocery store shelf. Unlike conventional bread, real sourdough is made through a long, slow fermentation process that uses wild bacteria and yeasts to transform grains into something your body can actually use. That fermentation also produces prebiotics, which feed the good bacteria already living in your gut. I explain more in my starter post, but the short version is that the fermentation breaks down gluten and removes anti-nutrients that block mineral absorption, making the bread easier for your body to process.
If you’re baking your first loaf, I know it can feel like a lot of steps. It looks way more complicated on paper than it actually is. That’s exactly why I filmed a full step-by-step video and included it in this post. Watch that first so you can see what each stage looks like. Seeing the texture of the dough, how I shape it, how it moves, makes such a difference. Then, while you’re actually baking, you can come back here and use the written steps below as a reference so you’re not guessing.
If you don’t have a sourdough starter yet, I have a previous post where I walk you through how to make one from scratch. It’s easier than you’d think. You’ll need an active starter before you begin.
And if you’re thinking, I work full time, there’s no way I can be home all day doing stretch and folds, I included a simple baking schedule at the bottom of this post. The fridge makes everything flexible. You can slow fermentation down and make sourdough work with your schedule instead of rearranging your life around bread.
If this is your first time, just know you don't need to get it perfect. You just need to bake your first one. The more you bake, the more confident you'll feel! And once you have the basics down, sourdough opens up a lot more than just bread.. bagels, pizza dough, focaccia, tortillas, pancakes, discard crackers, the list goes on!
What You’ll Need for Baking Sourdough Bread:
A banneton proofing basket, the ones I use HERE.
A mixing bowl. I love this one from Ballerina Farm, the size is perfect for stretch and folds.
Bread covers for the bowl or tea towels (you could also use a plate over the bowl)
A bread lame (the one I have) or razor blade for scoring
Bread Slicer: optional of course, but I love mine and use it with every loaf, makes it so simple to slice.
Step 1: Feed Your Starter
Feed your starter about 12 hours before you plan to mix your dough.
For example, if you want to mix your dough at 8am, feed your starter around 8pm the night before. That’s what I usually do. I’ll feed it around 8pm so it’s ready and bubbly first thing in the morning.
In colder months, especially if your kitchen runs cool, it may need the full 12 hours to properly rise. In warmer months, it might peak a little sooner.
You want to use your starter at its highest point. It should have doubled in size, look bubbly all the way through, and smell pleasantly tangy. If you see that it has already risen and fallen back down, that just means you missed the peak. No big deal. Feed it again and wait for it to rise before starting your dough.
Step 2: Mix the Dough (Autolyse – No Salt Yet)
In a large bowl, mix:
210g water (1 cup)
60g active starter (¼ cup)
Stir until the starter mostly dissolves.
Then add:
300g flour (2½ cups)
Mix until there’s no dry flour left. It’ll look rough and shaggy. That’s exactly what you want.
Don’t add the salt yet.
In the video, I added the salt at the beginning because that’s how I originally learned. Sometimes I still do it out of habit. It won’t ruin your loaf if you add it now. Salt tightens gluten and slows fermentation slightly, so adding it early just makes the dough develop a bit more slowly and feel slightly tighter during the first rest. It’s not wrong, just not ideal.
It’s better to add the salt after the autolyse. During that 30–60 minute rest, the flour and water are fully absorbing into each other and the gluten is starting to form on its own. If you add salt right away, it tightens the gluten and slows that process down a bit.
Leaving the salt out at first makes the dough more relaxed and stretchy, which makes it easier to work with and shape later.
What I usually do (when I remember!) is measure the salt at the same time as the flour and water, but I put it in a tiny separate cup next to the bowl. That way it’s ready to go and I don’t forget to add it after the rest.
Cover the bowl with a tea towel or plate so it doesn’t dry out and let it rest 30–60 minutes.
Step 3: Add the Salt
After the autolyse, sprinkle: 6g salt (1 teaspoon) over the dough.
Wet your hand and gently squeeze and fold the dough until the salt is fully incorporated.
Step 4: First Stretch and Fold (This Happens After Autolyse + Salt)
Over the next two hours, you’re going to do four sets of stretch and folds. The first one happens now, after the autolyse and after you’ve added the salt.
With wet hands, reach under one side of the dough, gently stretch it up, and fold it over the center. Turn the bowl slightly and repeat. Go around the bowl 4–5 times. That’s one full set.
When you’re done, cover the bowl with a tea towel or a plate so the top doesn’t dry out, and let it rest for 30 minutes before the next set.
Step 5: Continue Stretch and Folds
You’ll do three more sets of stretch and folds, spaced 30 minutes apart.
Each time:
• Wet your hands
• Stretch one side up
• Fold it over
• Turn the bowl and repeat
Cover the bowl after each set and let it rest 30 minutes.
By the fourth set, the dough should feel smoother, stronger, and more elastic.
Step 6: Bulk Rise
After your last stretch and fold, cover the bowl and let the dough keep rising. This stage is called the bulk rise.
Now you’re just letting the dough build air and strength. You’re looking for it to become slightly domed on top, puffier than before, and a little jiggly if you gently shake the bowl. It doesn’t have to fully double, but it should look noticeably fuller and lighter.
For reference, mine is usually ready after about 3 hours total in this stage. If it’s not looking slightly domed and puffy by then, I just let it keep going. Sometimes it needs more time.
Warmer kitchens will move faster. Cooler kitchens will take longer. Try to watch how the dough looks and feels instead of focusing only on the clock.
Step 7: Preshape
Turn the dough out onto your counter. Don’t flour the surface for this step. The slight grip of the counter is what helps you build tension on the outside of the dough.
Gently gather the edges of the dough toward the center. Then flip it over so the smooth side is facing up.
Lightly pat out any very large air bubbles. You’re not pressing all the air out, just evening it out so you don’t end up with one giant hole.
Now place your hands on the counter so your pinkies are touching the surface and you’re gently cupping the dough. Pull the dough toward you in a straight line across the counter. As you pull, the bottom edge will tuck underneath itself.
Rotate the dough slightly and repeat. Each pull tightens the surface a little more. You’re building surface tension so the loaf rises upward in the oven instead of spreading outward.
Once it forms a smooth, round shape, leave it on the counter, cover it with a tea towel, and let it rest for 30 minutes.
Step 8: Final Shape
I use a bench scraper for this step because it makes lifting and moving the dough easier.
Lightly flour the top of the dough. Then use your bench scraper to gently flip it over so the floured side is now facing down on the counter.
Gently stretch the dough out into a rough rectangle. It doesn’t need to be perfect. Fold one side into the center. Fold the opposite side into the center so they meet. Then start at one end and roll it up like a burrito. This helps tighten the structure and build strength inside the loaf.
Now lightly dip the sides of your pinkies in flour so they don’t stick. Place your hands around the dough and gently cup it. Pull it toward you across the counter again to build final tension, just like you did during preshape.
Turn it slightly and repeat. I usually keep turning and pulling for a minute or two until it forms a nice domed shape and the surface looks smooth, with any fold lines tightened underneath.
Step 9: Final Proof
Take your banneton and dust it generously with flour. Rice flour works best because it prevents sticking, but all-purpose flour works just fine if that’s what you have.
Using your bench scraper, gently lift the dough and flip it into the banneton seam side up. I usually give the seam a little squeeze with my fingers to make sure it’s fully sealed.
At this point, the bread is essentially upside down in the banneton. The smooth side is on the bottom, and the seam is facing up. Cover it with a tea towel.
Let it rise until it increases in size by about 30–50 percent. It should look slightly puffier and feel airy when you gently press it with your finger. This can take anywhere from 1½ to 4 hours at room temperature.
Or, you can refrigerate it at this point and bake the next day. I do this often depending on timing. If I don’t have time to bake the same day, or if I want fresh bread ready early the next day, I’ll prep the dough, put it in the fridge overnight, and bake it straight from cold. It’s usually the easiest method for fitting sourdough into real life.
Step 10: Bake
About 1 hour before you plan to bake, preheat your oven to 450°F with your empty dutch oven inside. You want the dutch oven fully hot before the dough goes in. That blast of heat is what gives you a good rise.
When the oven is almost done preheating, flip your dough out of the banneton onto a piece of parchment paper. Make sure the parchment is large enough that you can grab the sides to lower it into the dutch oven.
When you flip it out, the smooth side should now be facing up and the seam should be on the bottom against the parchment.
Use a bread lame or sharp knife to make one deep slash across the top. Don’t be timid here. A confident cut helps control how the bread expands in the oven.
Carefully remove the hot dutch oven from the oven. Using the parchment paper as handles, lift the dough and gently lower it into the hot dutch oven.
Put the lid on and bake covered for 30 minutes.
After 30 minutes, remove the lid and bake another 15 minutes, until the crust is golden brown.
Step 11: Cool
Let the loaf cool for at least 30 minutes before slicing. I know it’s tempting to cut into it right away, but if you slice it too soon, the inside will be gummy because it’s still finishing cooking.
Once it’s fully baked, the bottom of the loaf should sound hollow when you tap it.
When I’m ready to slice, I like using a bread slicer so the pieces come out even, especially if I’m serving it for dinner or making toast the next morning.
Sample baking schedule:
Option 1: Bake Once a Week (Two Loaves at a Time)
This is perfect if you want fresh bread for the week and don’t want to go through the whole process multiple times.
If you’re making two loaves, just double every ingredient in the recipe. You’ll mix one large batch of dough in one bowl, then divide it in half after the bulk rise before preshaping. You don’t need two separate bowls.
For example, you want to bake Saturday morning:
Thursday Night
8:00pm – Feed your starter so it’s active Friday morning.
Friday Morning
8:00am – Mix your dough (double recipe).
Let it rest 30–60 minutes (autolyse).
Add salt.
Do your first stretch and fold.
8:30am – Second stretch and fold.
9:00am – Third stretch and fold.
9:30am – Fourth stretch and fold.
Then let the dough continue rising until it looks slightly domed and puffy. This usually takes another 2–3 hours depending on your kitchen.
Around 12:00–1:00pm – Divide the dough in half.
Preshape both pieces. Rest 30 minutes.
Final shape both loaves and place them in bannetons.
Cover and refrigerate both overnight.
Saturday Morning
8:00am – Preheat oven with dutch oven inside for 1 hour.
9:00am – Bake straight from the fridge.
You don’t need to bring the dough to room temperature before baking. I bake mine straight from the fridge most of the time.
Bake one loaf, then bake the second right after.
If you’re not eating both loaves right away, let the second loaf cool completely, slice it, and freeze it in a freezer-safe bag. You can toast slices directly from frozen.
You can leave shaped dough in the fridge up to 24–36 hours. The longer it sits (within reason), the more flavor develops. After about 36 hours, it may start to overproof.
If something comes up and you can’t bake when you planned, just leave it in the fridge and bake the next day. It’s very forgiving.
If you bake weekly, keep your starter in the fridge and feed it once a week. The night before you want to bake, pull it out and feed it so it’s active by morning.
Option 2: Full-Time Work Schedule (Minimal Daytime Hands-On)
If you’re not home during the day, use the fridge to slow everything down. The cold replaces some of the daytime stretch and fold timing.
For example, you want to bake Wednesday evening:
Monday Night
8:00pm – Feed your starter.
Tuesday Morning (Before Work)
6:30am – Mix dough.
Rest 30 minutes.
Add salt.
Do one stretch and fold.
7:00am – Do one more stretch and fold.
That’s enough.
Before leaving for work, cover the bowl and put it in the fridge. The dough will rise slowly all day.
Tuesday Evening
6:00pm – Take dough out of fridge.
Let it sit 30–60 minutes if it feels very cold.
Preshape. Rest 30 minutes.
Final shape and place in banneton.
Put it back in the fridge overnight.
Wednesday Evening
6:00pm – Preheat oven.
7:00pm – Bake straight from the fridge.
You can leave the shaped dough in the fridge up to 24–36 hours if your schedule shifts.
If you truly can’t do four stretch and folds, don’t stress. Two solid sets are enough. Just let the bulk rise go a little longer.
If You’re Brand New
If this is your very first loaf, I’d recommend doing it on a day you’re home so you can watch how the dough behaves. Once you’ve seen it once from start to finish, adjusting the schedule to fit your work life becomes much easier.
The biggest thing to remember is this: sourdough doesn’t require perfect timing. The fridge gives you flexibility. If something changes in your day, you can usually slow things down instead of starting over.
Helpful tips:
One of the best pieces of advice I got after I took my sourdough class was simple: bake five loaves. Even if they look ruined. Even if you’re standing there thinking, this isn’t going to work. Just bake them.
It’s so tempting in the beginning to judge the dough before it ever hits the oven. You think it didn’t rise enough, or maybe it rose too much, or it feels stickier than last time. I’ve been there. But the truth is, you don’t really learn until you bake it and see what happens.
After about five loaves, something starts to click. You stop relying only on the clock and start paying attention to what the dough actually looks and feels like. You begin to understand how long bulk rise really takes in your kitchen, not what a recipe says it should take. You notice how different it behaves in the winter versus the summer. You see how your starter peaks a little faster on warm days and takes its time when it’s cold.
And even the loaves that aren’t “perfect” are still fresh bread. A slightly flat loaf still tastes incredible toasted with butter.
So if you’re unsure, bake it anyway. Give yourself five loaves before you start judging your bread. By then, you’ll know way more than you think!
Let me know how it goes, send me a message on here or in the chat and I can help you with any troubleshooting as well! :)
xx Brittany

